
WordPress is the most popular content management system (CMS) and it powers 34% of all the websites on the internet (about 64 million WordPress websites) and it has a 60.8% market share in the CMS market. The best part about WordPress is that it’s easy to use, and it has all the tools to make different types of websites. Thanks to the new major updates, web design on WordPress has never been easier.
In this tutorial you will learn how easy to make a website using the Minimalist WordPress Theme Noor, we will start with WordPress child theme installation, activate the required plugins, and then implement the design and publish our work.
Let’s start our WordPress website design project!
Theme Installation
First, you need to get the WordPress theme that you want to use to build your website, in this tutorial I will use Noor WordPress Theme and you can Get it from ThemeForest Once you download the theme’s zip file to your computer go ahead and log in to your site admin page. Once there, go to Appearance > Themes.

Then click Add New button, in the next screen you will see a list of themes with the ability to search for the available themes in the WordPress directory. In our case, we will use our downloaded theme.
To do that click the Upload Theme button and then upload the theme and click Install Now button.

After the install is successfully finished click Activate.

Then you will be redirected to the theme Wizard installation, in this step, you will be asked to activate the theme, name the child theme, install the plugins and choose a pre-made template to install, in our case we won’t install the demo and we will just use the theme. And we are done with the WordPress theme installation.
Implementing the design:
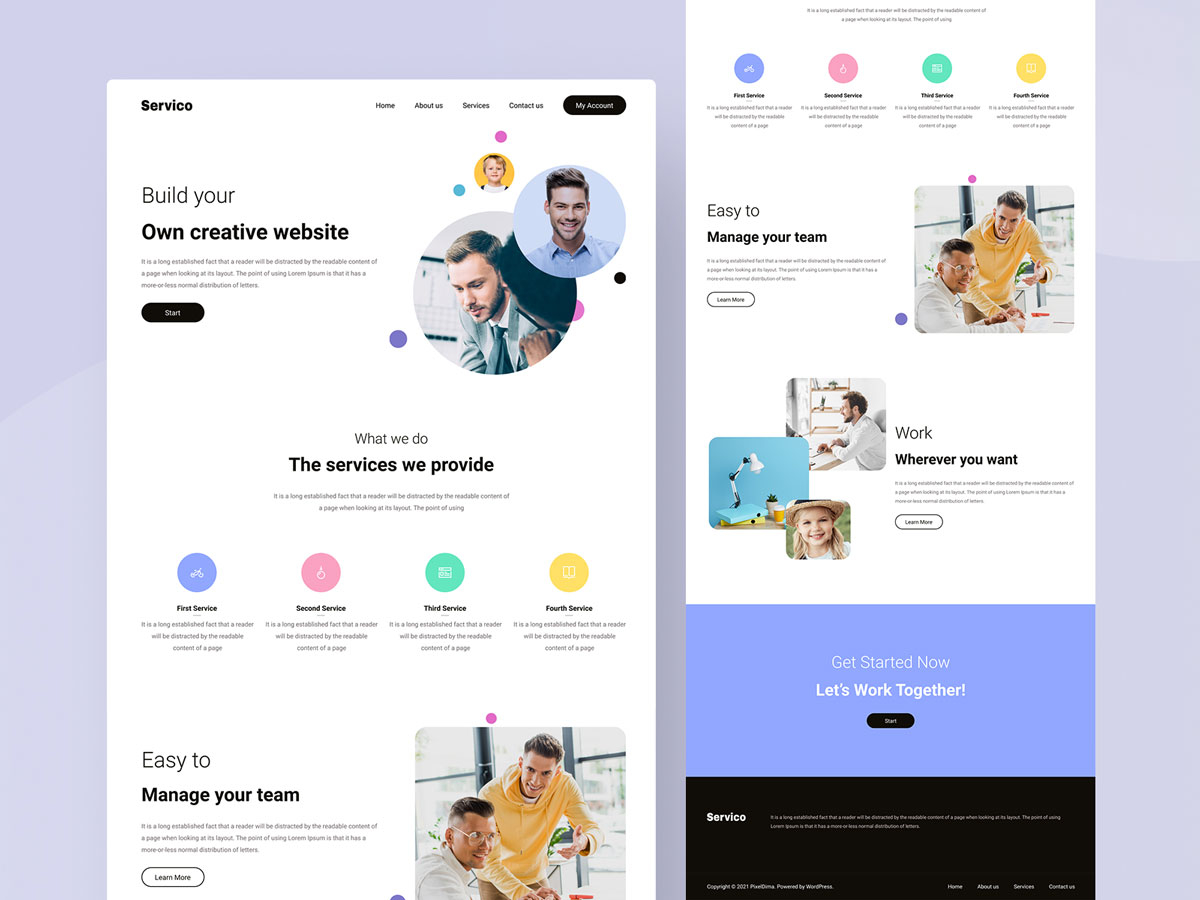
We will use the attached pre-made design (Figma Template). It’s free for download and you can use it for your own website.
Before start making the website first we need to add the style to the customizer so whenever we create an element the style will be applied to it.
In the WordPress admin panel navigate to Appearance > Customize then in the customizer select Site Layout and Design > Site Style and apply:
Primary Color: #100D07
Secondary Color: #100D07
Then from Customize > Typography apply the same font style from the design file to:
Body: Font Size: 16px, Font Color: #6F6868
Main Menu: Font Size: 18px, Font Color: #100D07
H1,…H6: Heading Color: #100D07
Button: Font Size: 18px
Footer: Widget text color: #D2C5C5
*Font Family used in all parameters is Roboto
As we finished applying the style now, let’s start building the website!
Creating the header:
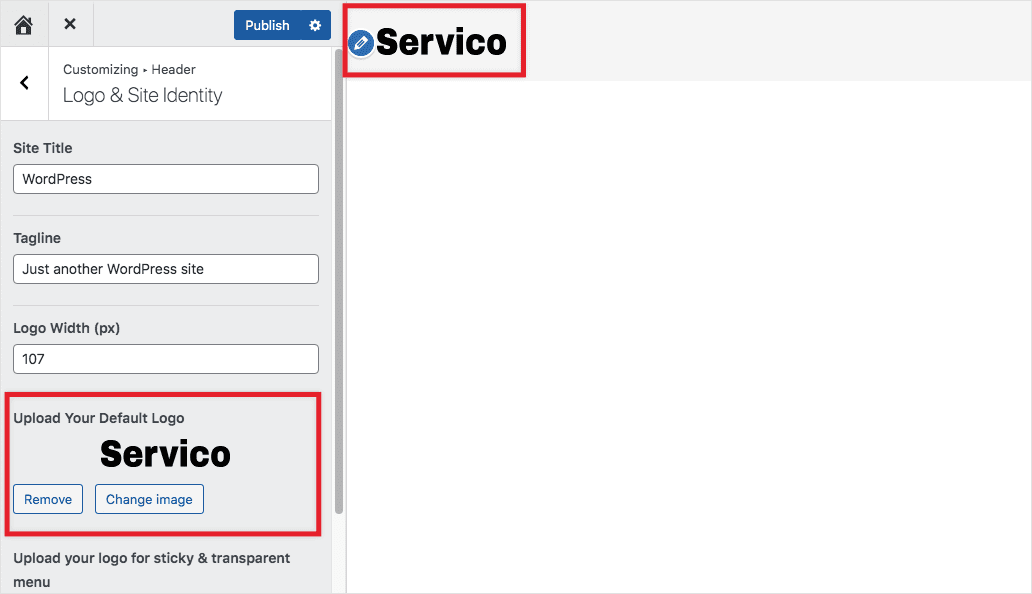
The header contains the logo, the navigation menu, and the first introduction section. First, we need to add the logo to do that navigate to the customizer select Header > Logo & Site Identity and upload your logo on Upload Your Default Logo the preview will be shown directly on the right side of the customizer if you are happy with the display result, click the publish button.
Now we need to create the different pages so we can add them to the navigation menu.
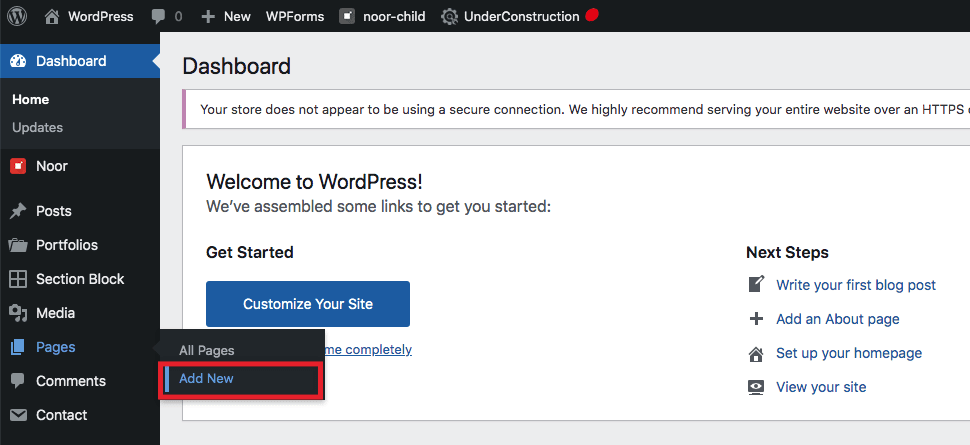
To do this, in the WordPress admin panel navigate to pages and click add new name the pages and do the same for the rest of the pages.
Now we need to create the navigation menu, in WordPress Admin Panel navigate to Appearance > Menus, name your menu (I’ve named it Main Menu but you can choose the name you want) then click create.
To add the pages in the menu that we created we need to choose them from Add Menu Items > Pages (View All). Select the pages that you want to add and click Add to Menu Button.

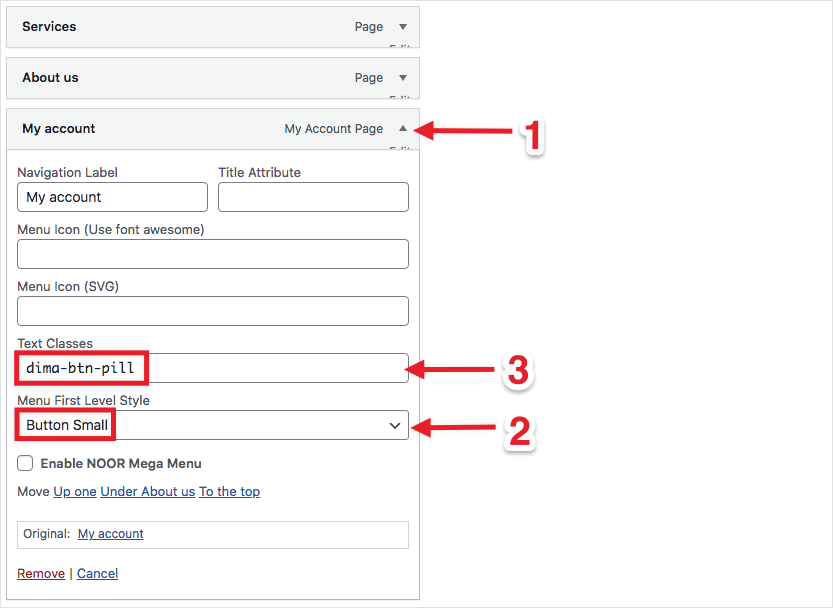
In our template, we have the last menu item “My Account” styled as a button. So to make it looks the same we need to open the Menu Item Parameters to do that click the arrow at the right of the menu item, in the Menu First Level Style select Button Small and add the class “dima-btn-pill” in the Text Classes field to apply the pill effect.
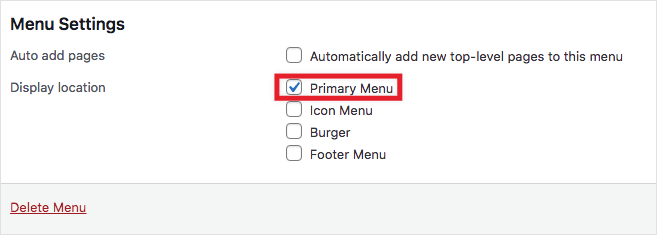
Now let’s make this menu our primary menu and assign it, to do that check the primary menu checkbox in the Menu Settings below the items.
Now let’s add our homepage contents and start with the first section. Navigate to Pages > Home and click Edit With WPBakery Page Builder
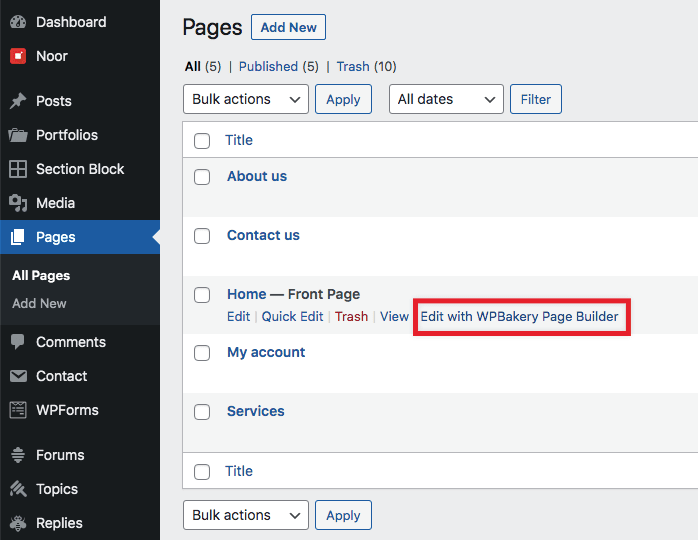
You will be redirected to the front-end editor where you can add the contents easily. Click Add Element button then add the Section Row element and divide the section row into two columns as shown in the animated GIF below.
Now in the left column, we will add headings, text, and button elements.
To do that click on the orange plus button each time you need to add a new element and add the content and the style of each one and click save in the element settings to see the effect.
In the right column let’s add the image, to do that click the plus button and choose the image element, and hit save. And we are done with the first section on our website, click the update button in the top bar, and let’s jump to the next section.
In the second section, we have a title and small description, and four icon-box elements each icon-box represent a service.
First, we add the title of the section and make it at the center of the section.
Now let’s create a section row and divide it into four columns and add an icon-box for each column. The icon-box contain two sub-elements the first one is icon-box header contain the icon and icon style (Noor WordPress theme provide a list of SVG icons that you can use in your website and you can check the list here) and the second sub-element is the icon-box content and it contains the title and text of the icon-box.
The third and the fourth section are like the first section that we built together and I used the same steps. The only difference is in the Button style so in the Button Settings > Style > Button Style select the outline style.
Now let’s jump to the last section.
The last section contains a background color and simple text heading with a button
First, we will create a section row and add a background color to it then add the text and the button inside the section row as we did in the previous sections.*
Now the last part of the website, let’s create our footer.
The big footer contains the logo and description and the small footer contains the copyright info and navigation menu.
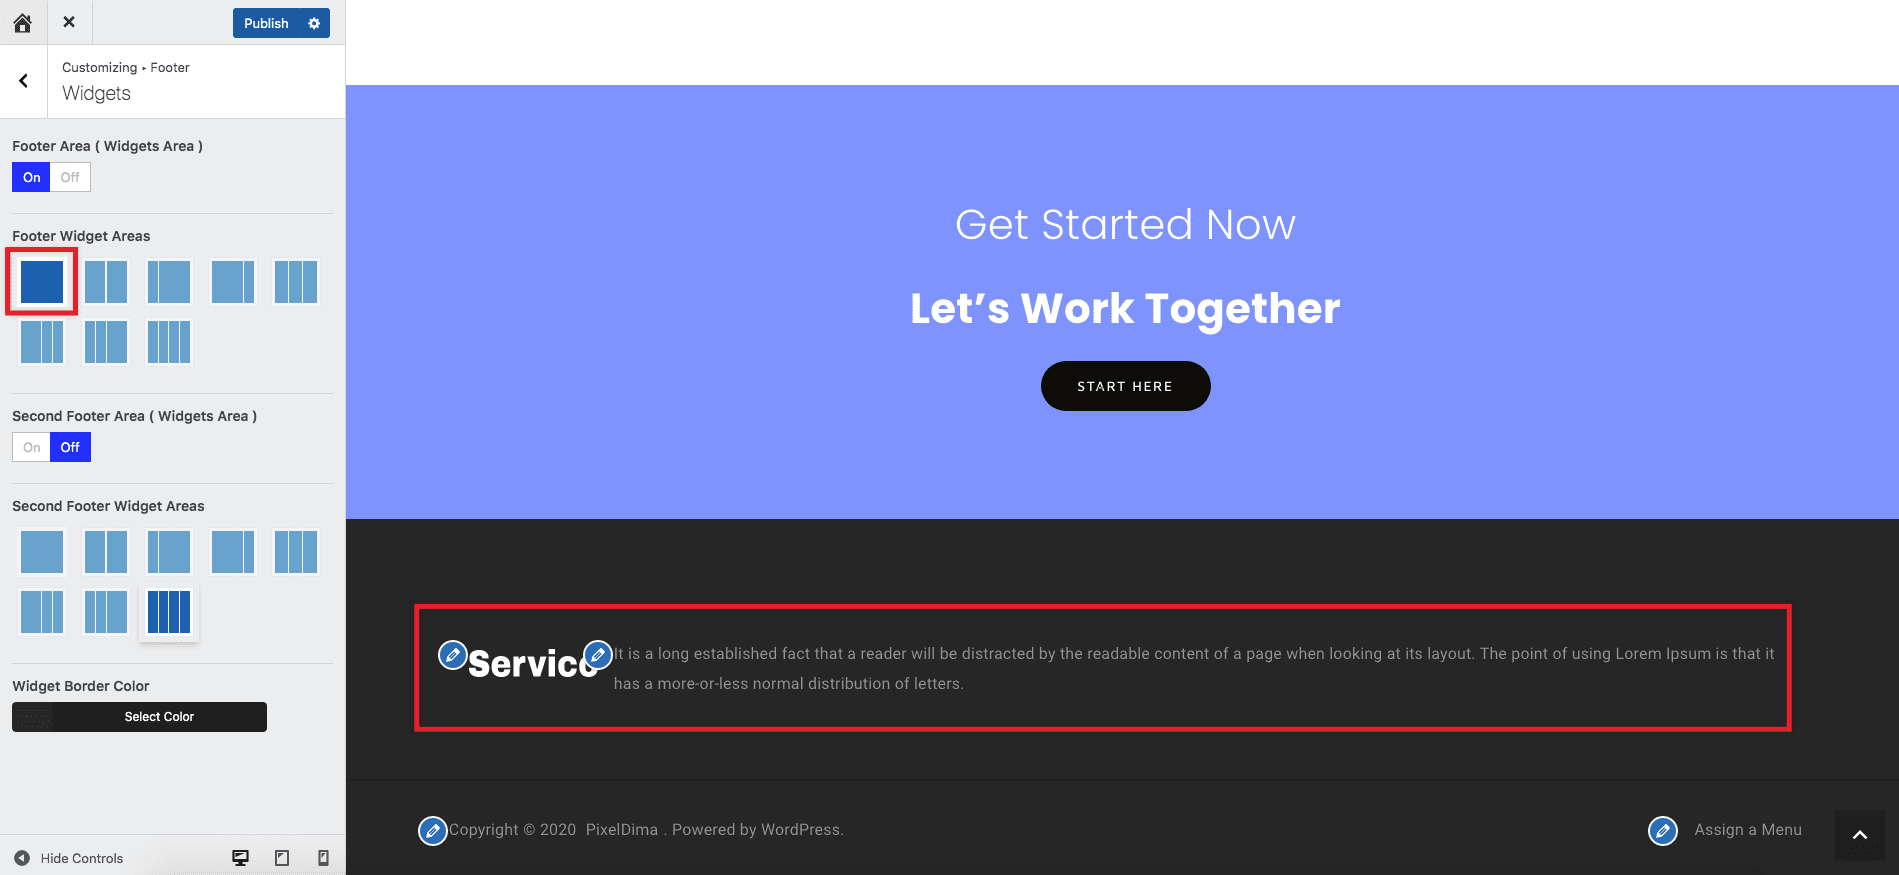
First, let’s add the widget to the footer via WordPress Admin Panel > Appearance > Widgets and add the contents in the First Widget Area #1 then hit update (In this time we will use Gutenberg Widget Editor as shown in the GIF)
Now in Customize > Footer > Widgets: Footer Widget Area choose the one column style.
For the small Footer just assign the menu that we created to Footer Menu via WordPress Admin Panel > Menus > Menu Settings and check Footer Menu
We hope you enjoyed our tutorial about making a website using WordPress. WordPress is a powerful tool that can help with most website needs and can provide a lot of freedom to create and customize your website.
If you’re interested in getting started with using WordPress for your own blog, we’d love to help. We offer a free consultation for beginners that helps you pick out a theme and customize it to fit your needs. We offer this consultation before you commit to buying any theme, so there’s no risk in trying this! You can contact us anytime with any questions!.
What are you waiting for? Get started on making your website today.


(1) Comments
I have learned a lot of knowledge about Web design with WordPress. Thank you a lot. It is a very helpful post.