
in this article, we’re going to show you how you can implement a new version of Google Tag Manager on a website running on WordPress, without needing to rely on developers or third-party plugins.
let’s get to it!
Table of Contents
What’s a Google Tag Manager?
Predominantly website owners need to add multiple code snippets to track their conversions, traffic, and gather other analytical data. With the Google Tag Manager tool, you are enabled to manage all of the tags/scripts added to your website or app from one simple interface.
Your website may have contains a few tags already. A common example is a tag used to embed Google Analytics on your site. You’ll be provided with a unique code snippet, which you can use to track the service when added to your website. The normal process for doing this may need to manually add the code to your WordPress website, which may require the help of a developer.
Google Tag Manager for WordPress is an excellent free tool for adding and updating tags to your website without editing the code of your website. All that’s required is to implement GTM on your website, after which you can add tags directly through its own interface. This way, you don’t need to rely on a developer when you want to add a new service.
How to Use Google Tag Manager With WordPress
First, you’ll need to create a free Google Tag Manager account. You can do this quickly with your standard Google account to do.
1. Create an Account in Google Tag Manager
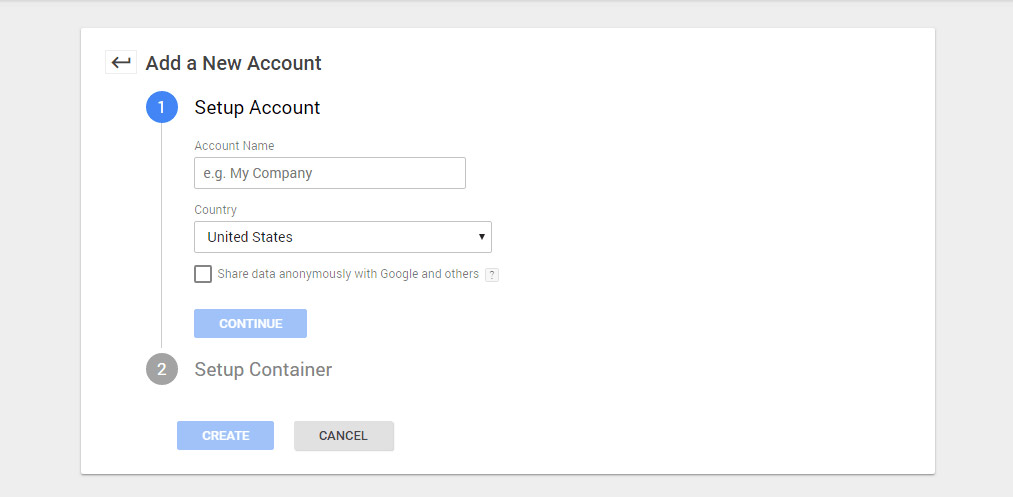
Go to https://www.google.com/analytics/tag-manager and click the blue “Start for free” button. Under “Setup Account,” enter the name of the company whose site is being managed and hit “Continue.”
Next, you’ll set up your container. Enter your domain name as the container name. As it represents your site, so give it the same name, then choose Web, and click “Create”.
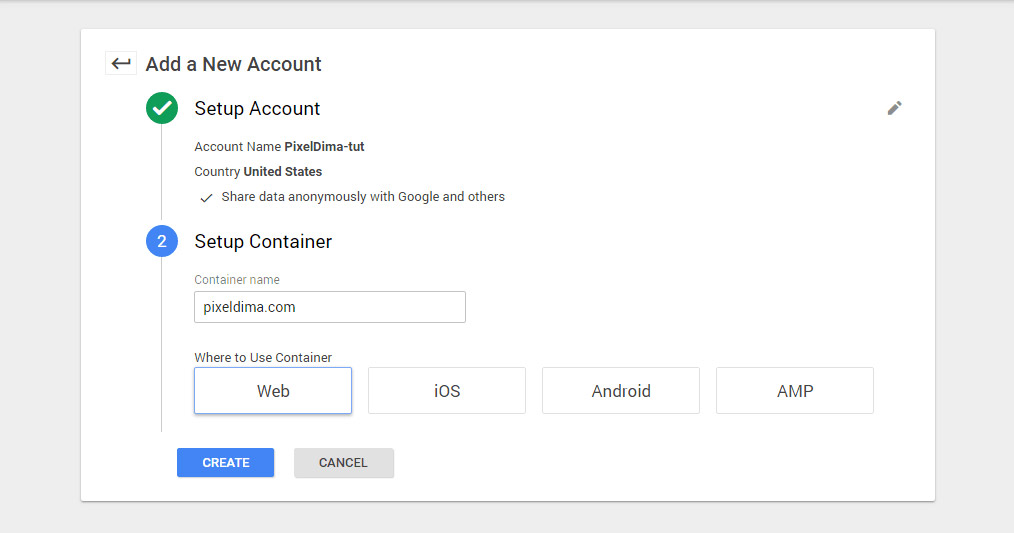
Multiple GTM accounts can be managed within a single GTM account, but Google advises creating one container per domain. You don’t have to create separate containers for each individual tag or for every individual page on a site; all tags can all be placed within one container.
After creating your container, accept the GTM terms of service and you’ll be given a pair of Google Tag Manager code snippets, which you’ll need to implement on your WordPress site:
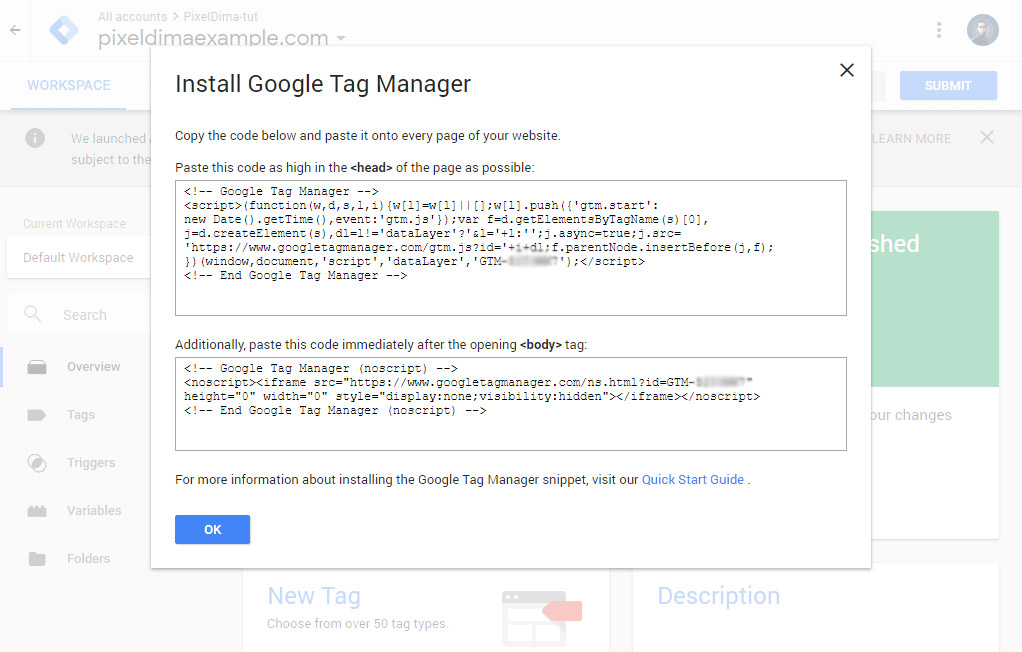
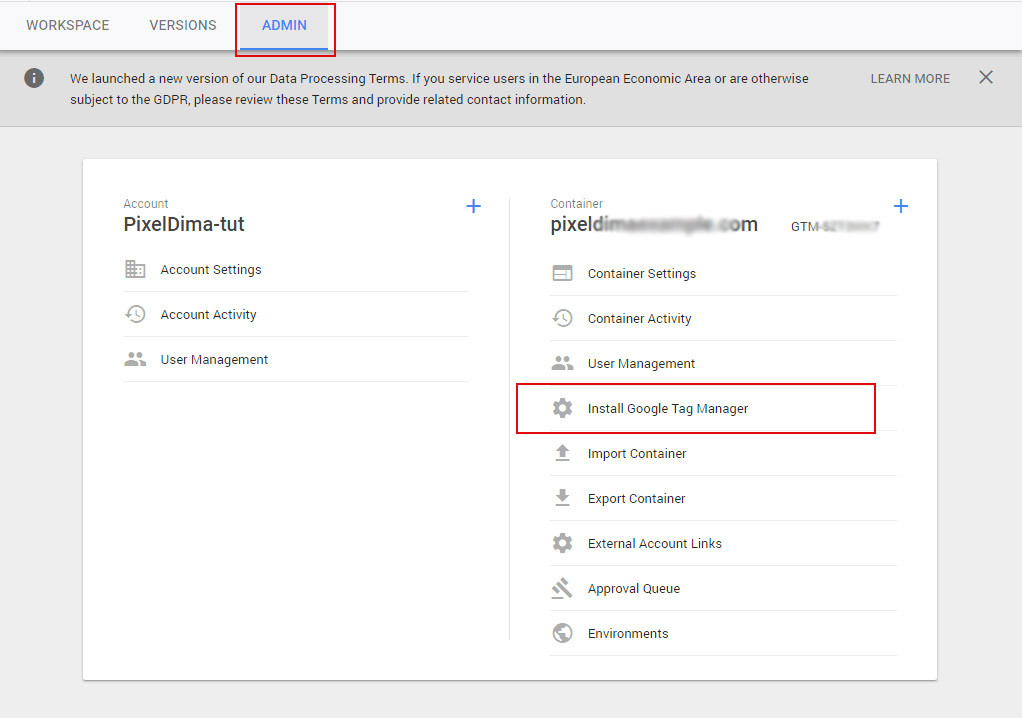
Copy these down for now, along with your unique ID (beginning with GTM-), you would also find it under the admin section in install Google tag manager:
2. Add the Google Tag Manager Code to Your Site
There are a few ways you can add your Google Tag Manager code snippet, so let’s look at them now.
A – Firstly, you could add the code snippets manually to the head and body of your site. This is a lot easier if you’re using Noor or Okab, using WordPress Customizer options enables you to add code directly into the head and body tags without third-party plugins following the steps below.
Step 1 – Navigate to WP Dashboard > Appearance > Customize
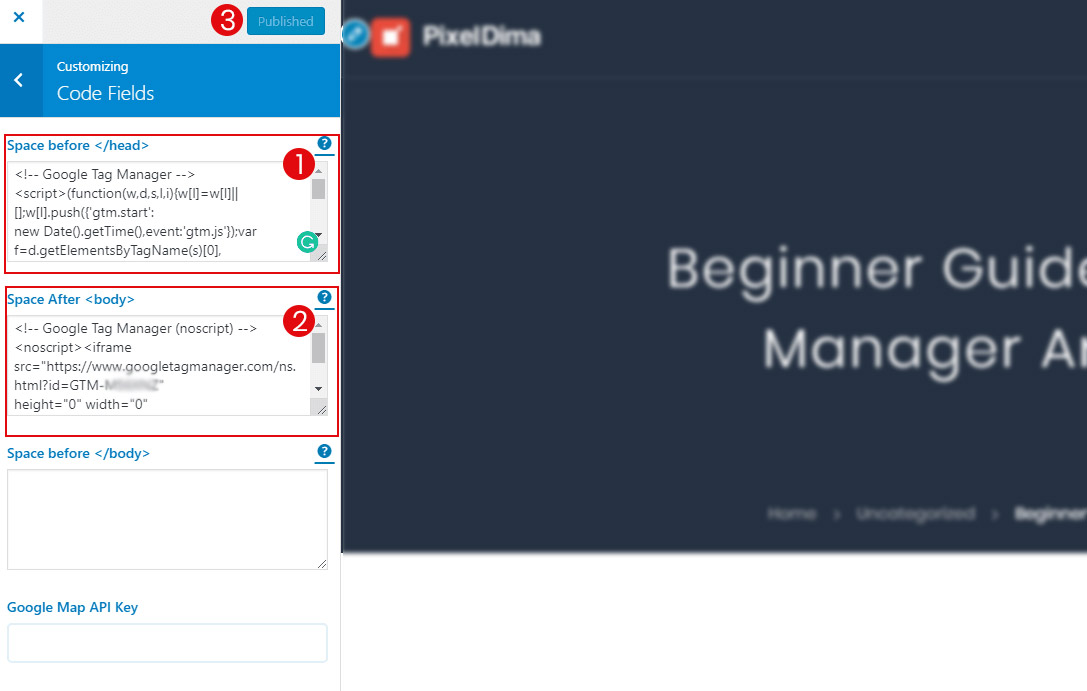
Step 2 – On the Customize page navigate to Code Fields > Space before </head>.
Step 3 – In the Space before </head>, you could paste your first tag manager code.
Step 4 – In the Space After <body>, you could paste your second tag manager code.
Step 5 – Click Published.
B – You can also use a plugin such as Insert Headers and Footers plugin, Upon activation, you need to visit Settings » Insert Headers and Footers.
Paste your tag manager code in the header section and click on the save button to store your settings.
C – Using DuracellTomi’s Google Tag Manager plugin. This is a handy plugin that enables you to easily integrate Google Tag Manager into your WordPress site:
Step 1 – Install and activate the plugin and you’ll see a notification asking you to add your GTM ID.
Step 2 – Click this link now to access the plugin’s Settings page.
Step 3 – Paste your ID into the text field provided and click Save Changes.
3. Set Up a Tag
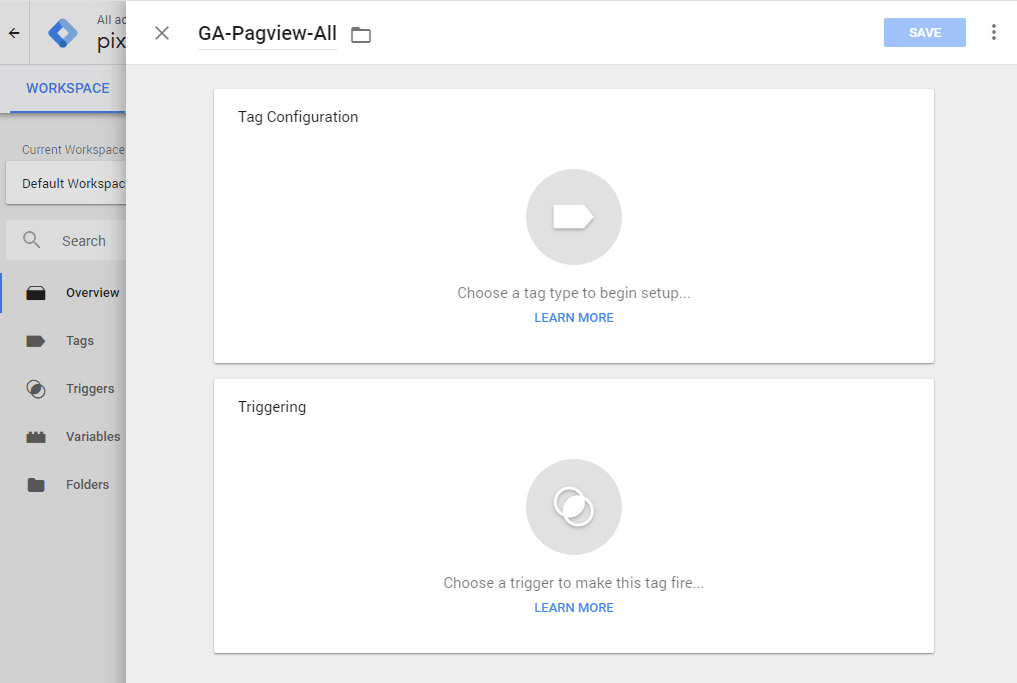
Once you have a Google Tag Manager account and you have added the GTM to your site, Return to the Google Tag Manager interface and Click “Add a New Tag” to open up a window where you’ll be able to name and configure your tag (1).
Note: You can create unlimited configurations of tags in Google Tag Manager.
- Remember to name your tags very clearly (you don’t want to be confused about which tag does what).
- Google’s recommended tag naming convention is: Tag Type – Detail – Location. For example, a Google Analytics tag that tracks pageview on all pages would be named “GA – pageview – all.”
2 – Now, back to set up a tag. When you click “Add a new tag” it will slide out a panel where you can configure the tag.
3 – There are dozens of tag types, we chose “Universal Analytics”. If you’re using a new Google Analytics account you already upgraded to Universal Analytics, so safe to say choose the “Universal Analytics”
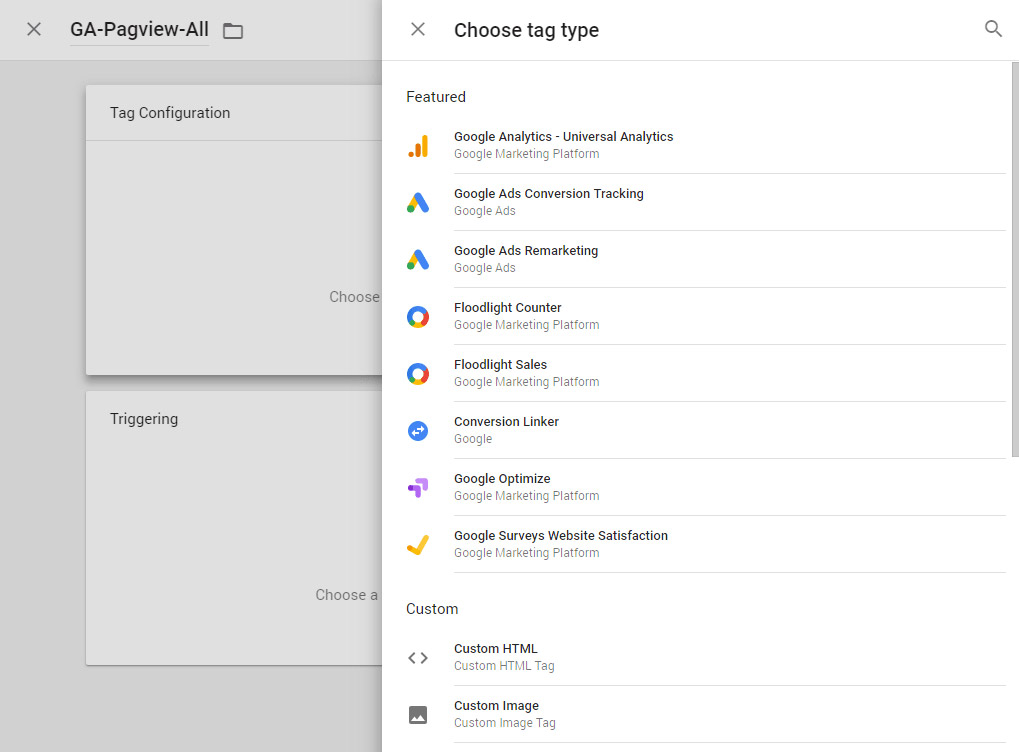
As we mentioned earlier, there are dozens of options available, But as an example, let’s say we wanted to notify Google Analytics anytime someone views our website. After choosing the Universal Analytics tag, this is what you see:
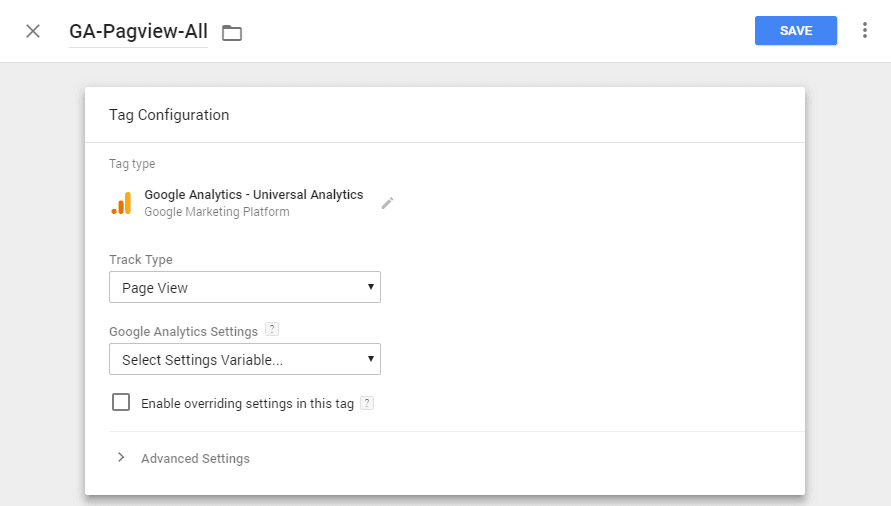
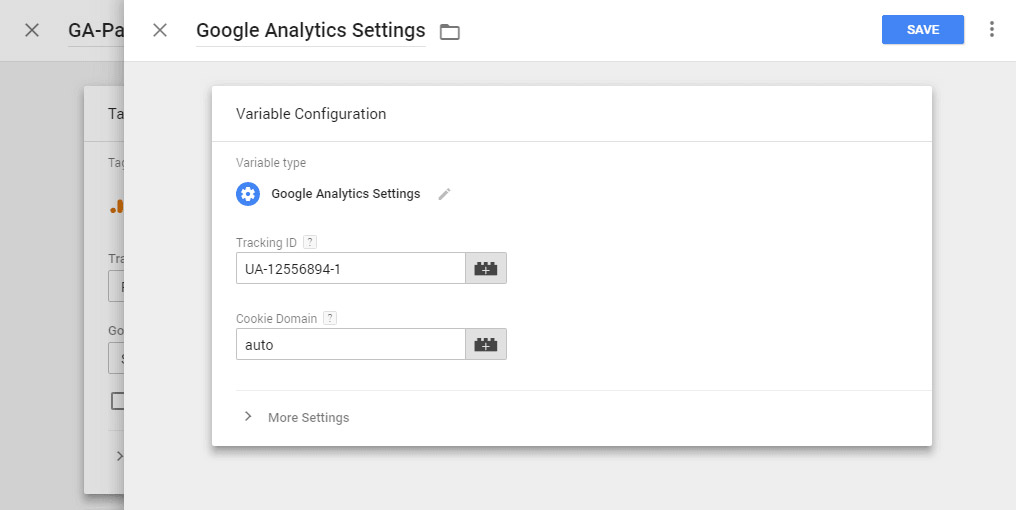
Now, all that you would need is to choose “Page View” from the “Track Type” drop-down menu, then create a variable by clicking the drop-down menu under “Google Analytics Settings” and choosing “New Variable” you’ll be asked to provide your Google Analytics ID.
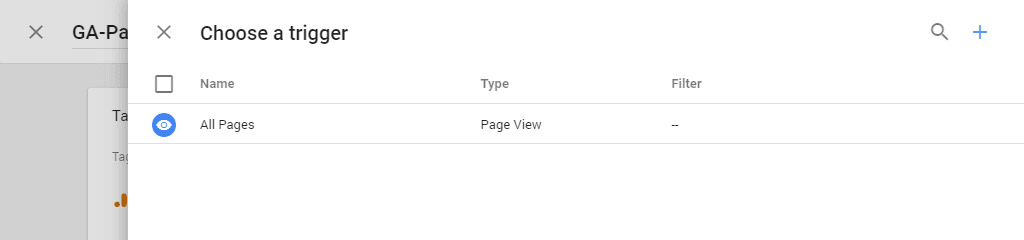
Next, you’ll need to create at least one trigger, which determines when the tag will fire or be blocked.
- Click the “Triggering” box underneath “Tag Configuration” to get started.
- Choose “Page View.”
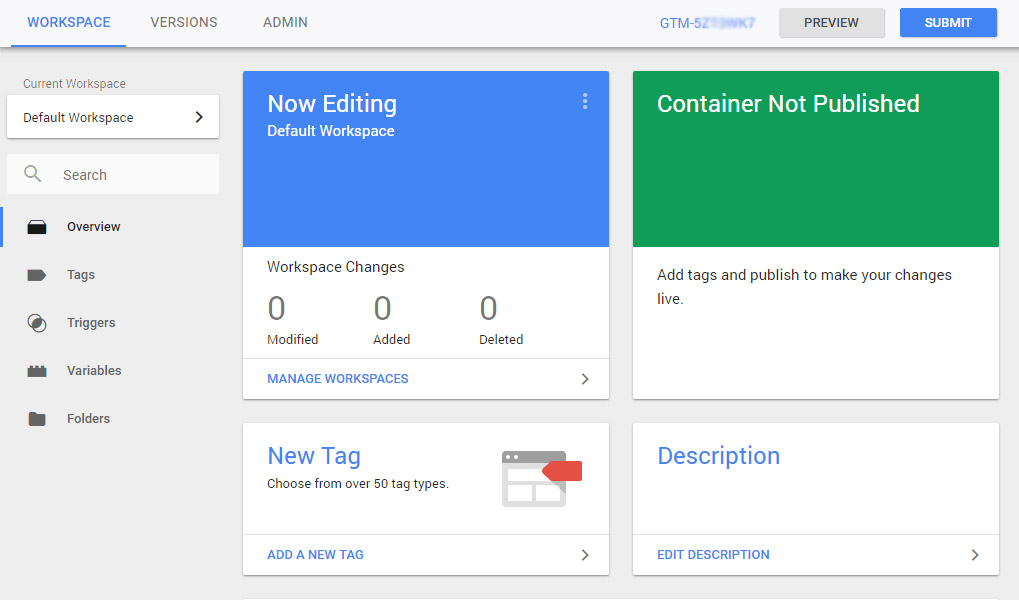
Once your tag and trigger have been configured, save it and you can either keep working by creating more tags or you can preview your tag and make sure it’s working correctly before publishing it.
Finally, you would need to publish the container by clicking the blue “Submit” button. Your tag won’t work until you do so.
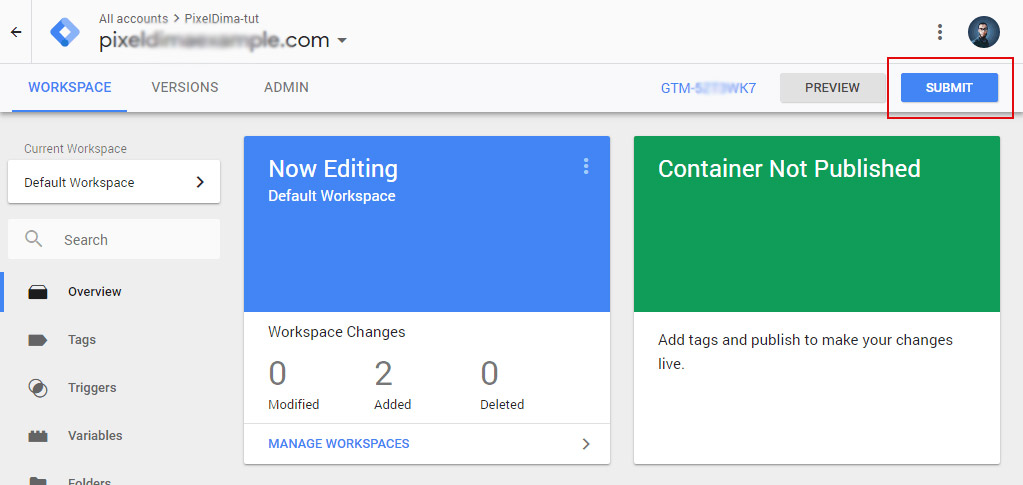
When you click “Submit”, you’ll be taken to this “Submission Configuration” page. There are two options: “Publish and Create Version” or “Create Version”. Since we ready to push the tag onto all site pages, you must select “Publish and Create Version”, and then press the blue “Publish” button in the top right.
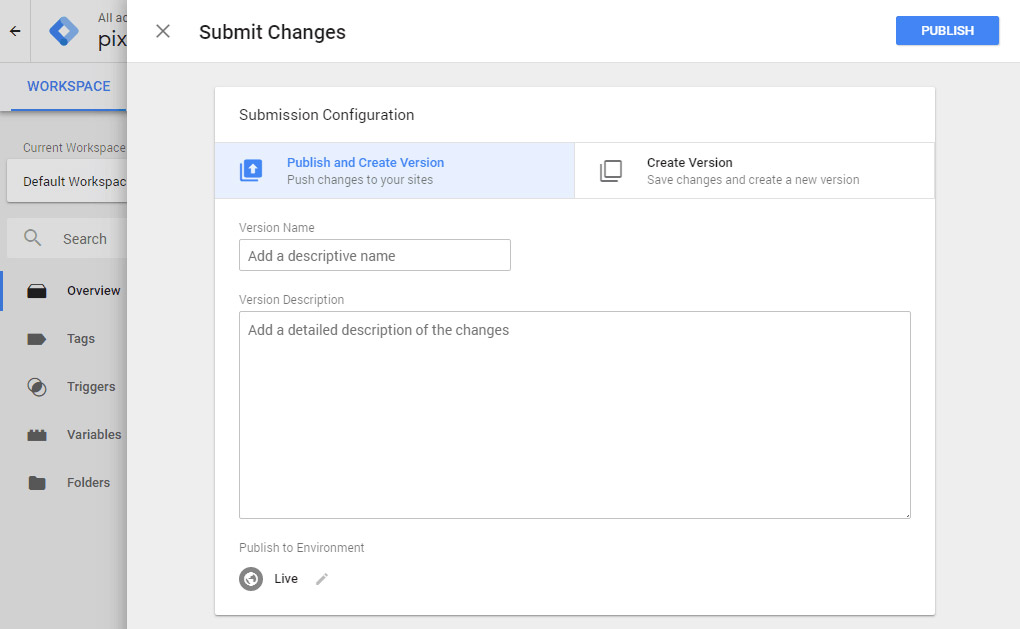
To keep your tags understandable and organized, add a name and description to understand what you’re trying to record with this tag.
Now, your WordPress is prepped for any tags you want to create within Google Tag Manager. With Google Tag Manager you will be enabled to embed multiple tags to your WordPress site and track them all from one location.
If you have any questions or comments about Google Tag Manager with WordPress? let us know in the comments below!