
In this article you will learn two things:
1 – Tracking your search using Google Analytics.
2- Enable auto search suggestions using Algolia.
Table of contents
Introduction
In order to understand our customer’s needs from the search they do, we enabled ‘Site search Tracking’ in Google Analytics to see what people are searching on our Documentation Website.
The default search engine you’ll get from WordPress is decent and simple by a specific order.
The ordering logic is as follows:
- Full-sentence matches in post titles.
- All search terms in post titles.
- Any search terms in post titles.
- Full-sentence matches in post content.
Search results by WordPress are not exactly great. Unlike Google, the WordPress search omits the emphasis on the keyword if it found matches.
How to Active Site Search Tracking
Step 1: Open Your Settings in Google Analytics: The first thing you need to do is to sign in to Google Analytics account and choose the site in which you’d like to enable search tracking. Click the Admin option. Then, click View Settings.
Step 2: Enable Site Search Tracking.
Step 3: Set your “Query parameter”: The “query parameter” is the letter that appears in your site’s URL before the search terms. For most WordPress sites, the query parameter is the letter “s.”
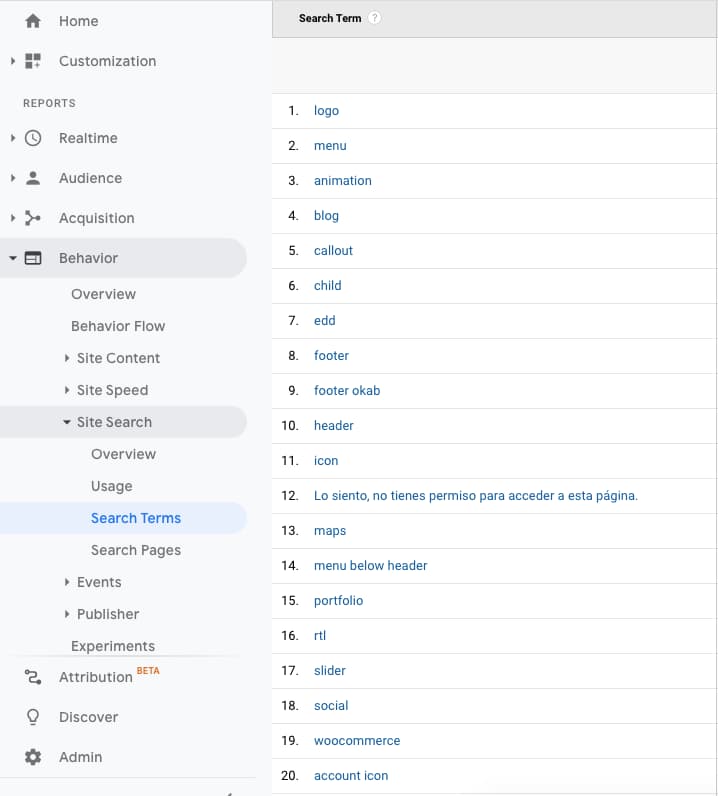
Now you can see how the visitors search your site. In Google Analytics, you can go to Behavior » Site Search » Overview to view your site search data.
What is Algolia?
Algolia is a “Search as a service”. It gets your data from your website ( Pages, Posts, Products or custom posts ), in a proper format ( do not worry we are going to use a plugin for that ) and Algolia provides you a search functionality with your data on your Website/App.
Why Algolia in WordPress?
- Offload WordPress search – Every time you search for a keyword in default WordPress, the keyword is searched in the MySQL table which is a resource-intensive task, especially if there are a lot of posts.
- Faster search results (extremely fast) – Algolia can get results in <5ms!
- Better user experience – Auto suggestions, typo tolerant, instant results, highlight keyword and much more.
- Language-agnostic – This means that, out of the box, Algolia supports all languages and alphabets, including symbol-based languages such as Chinese, Japanese, and Korean.
Pricing of Algolia
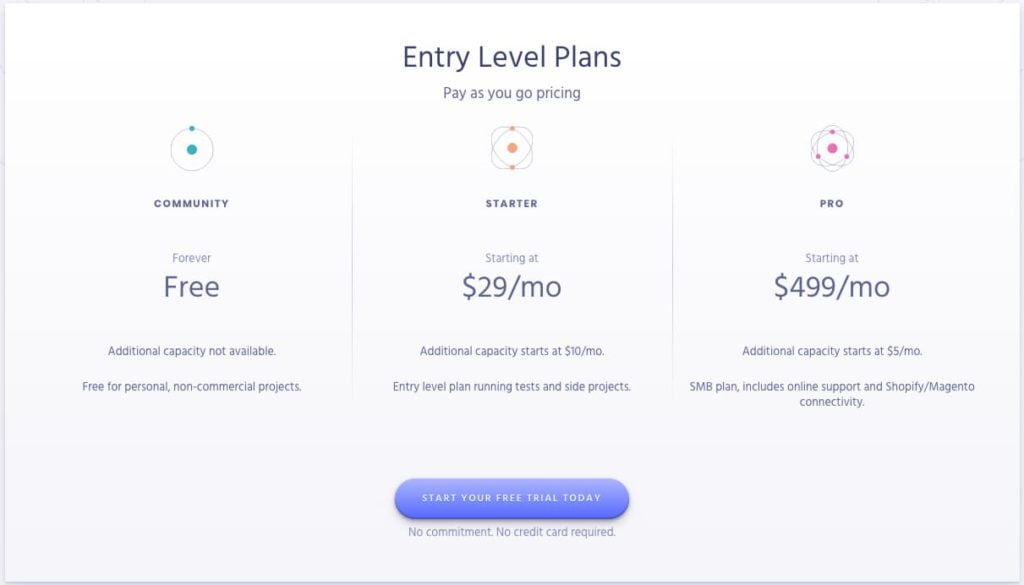
You can find the detailed pricing here.
The free plan is for non-commercial use but it’s more a legal term than anything. You can use the free plan as long as you display the Algolia logo in the search results page
How to Implement Algolia Search in WordPress
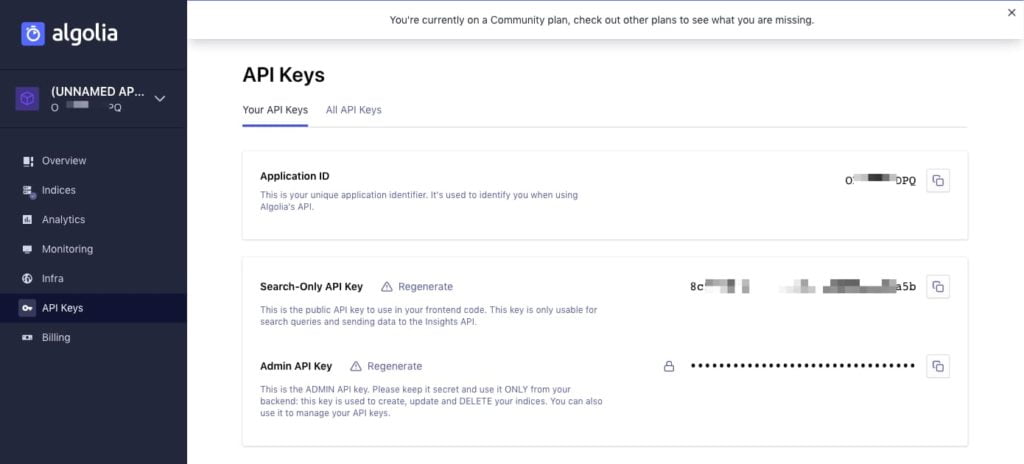
1 – Get Algolia API keys
Sign up for Algolia and get the API keys (an app will be automatically created).
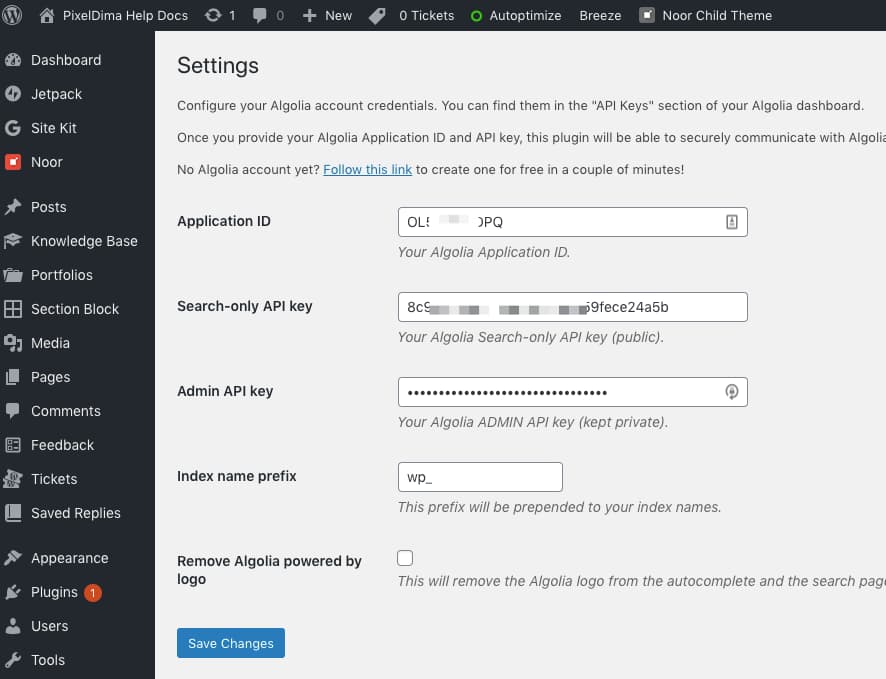
2 – Install and Configure WordPress plugin

Install WP Search with Algolia and add the above API keys in the plugin settings.
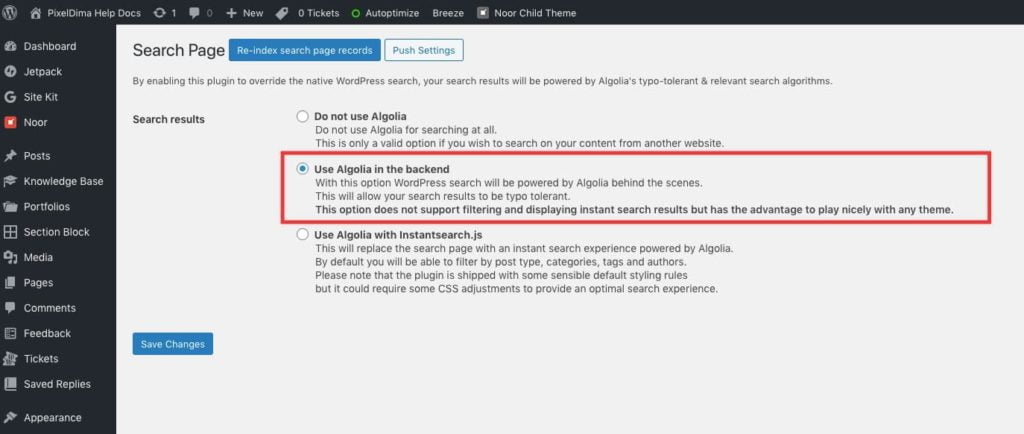
3 – Configure Search Page
By default, it will be set to “Do not use Algolia”. Choose “Use Algolia in the backend” or “Use Algolia with Instantsearch.js”.
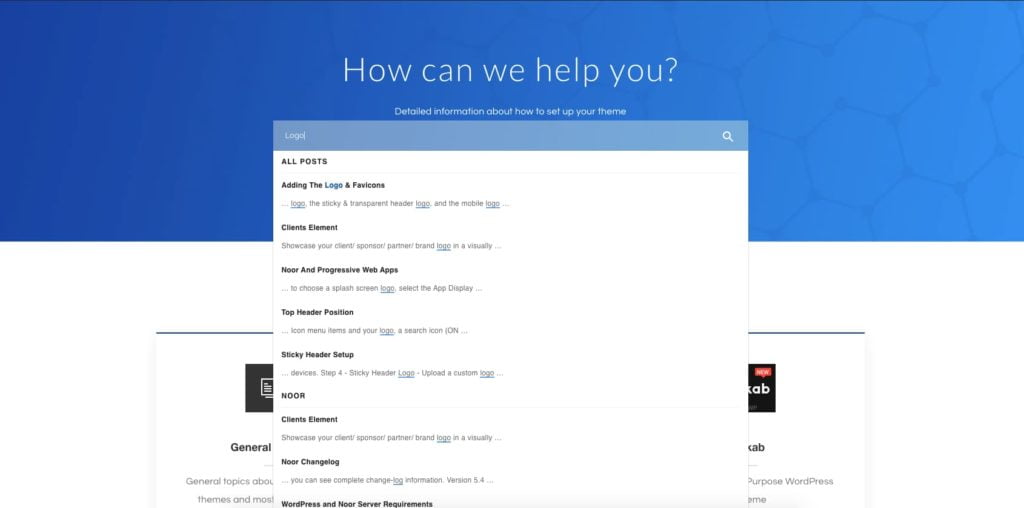
4 – Active Autocomplete
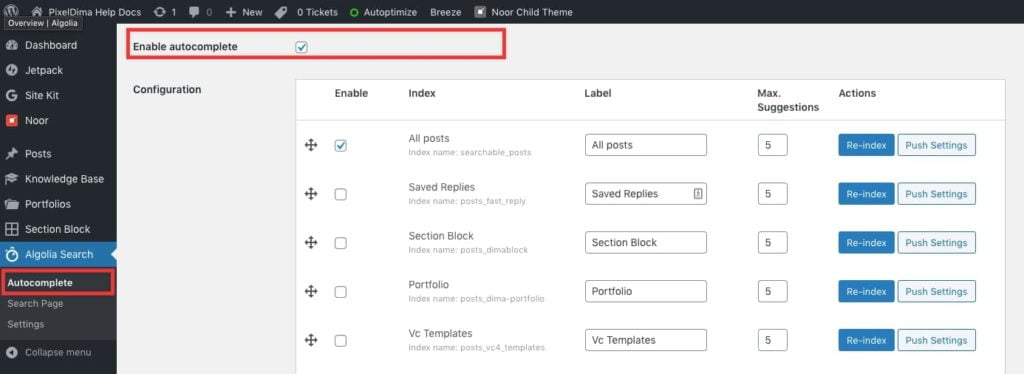
Here’s an example shows how the Autocomplete Work with our theme Noor
4 – Adding Algolia Logo On your Search result page

If you are like us using Algolia for free you must display the Algolia logo in the search results page, In order to do that with Noor Child theme all you need to do add this PHP function into function.php and don’t forget to change the “src” image URL
Conclusion
Adding Algolia gives you better user experience and faster results.
If you liked this article, then please subscribe to our Newsletter for WordPress tutorials.
Resources: