After installing AMP plugins, you have probably discovered that by default the Google Analytics code is stripped out from all AMP pages. To help with that, we’re going to show you how to add Google Analytics to AMP WordPress using AMP Plugin by Automattic.
Add Google Analytics to AMP WordPress
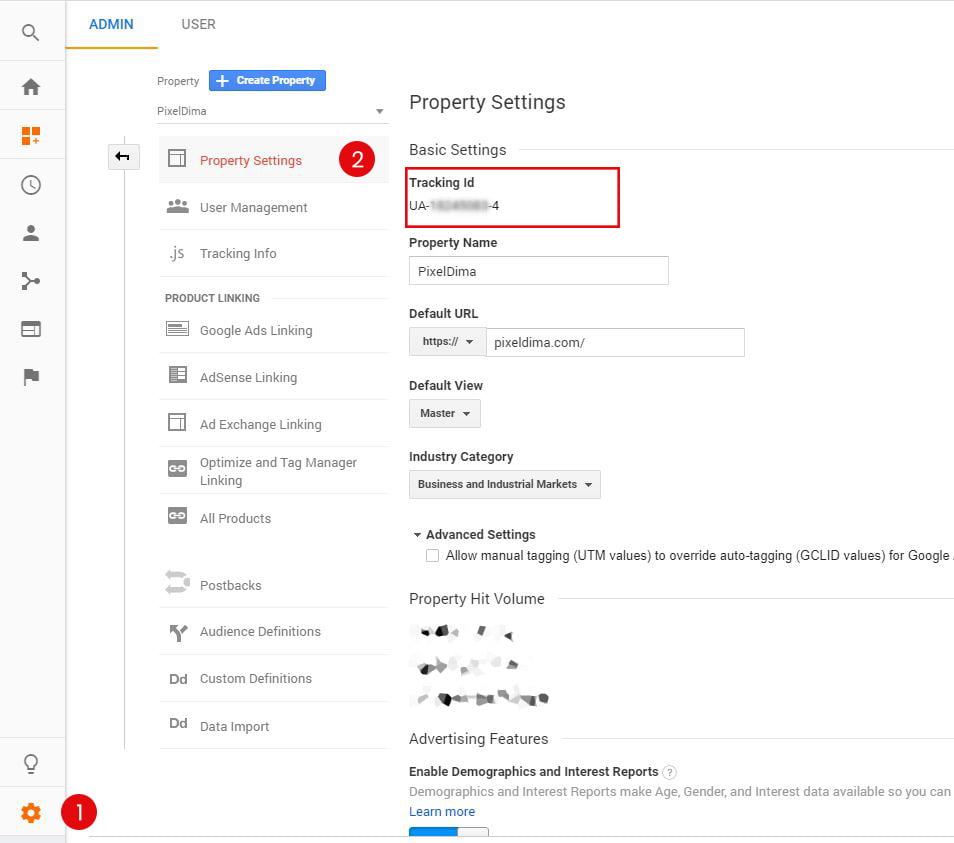
We’ll show you the complete process to this step – the only thing we’ll assume is that you already have added google analytics to your WordPress Site.
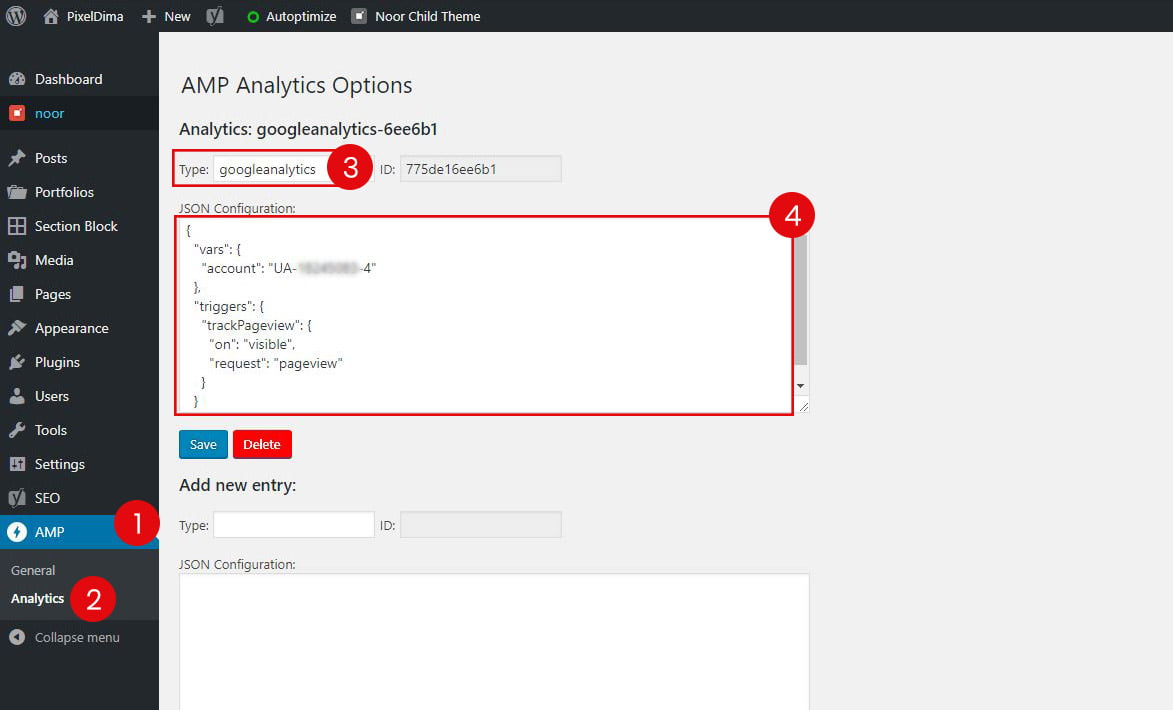
AMP By Automattic defines an analytics option to enable the addition of amp-analytics in your posts. When the plugin is active, an AMP top-level menu appears in the Dashboard (1) with sub-menu. Find the sub-menu ‘Analytics’ (2) and click on it:

Selecting Analytics in the sub-menu AMP options menu takes us to an Analytics Options entry page, where we can define the analytics tags we want to have, by specifying the vendor type (e.g. googleanalytics) and the associated JSON configuration.
A Sample JSON Configuration to Page tracking:
This JSON config allows you to measure the number of views for a particular page on your AMP pages.
{
  "vars": {
    "account": "UA-XXXXX-Y"
  },
  "triggers": {
    "trackPageview": {
      "on": "visible",
      "request": "pageview"
    }
  }
}

How to Find AMP Data in Google Analytics
To find AMP data in Google Analytics, log into your Google Analytics account and select the website in which you’d like to find the AMP data.
Go to Behavior » Site Content » All Pages. To view the data of your AMP pages only, use the search bar above the table with the keyword /amp. This will show you the traffic report of your AMP pages only.

finally, if you’re monetizing your AMP WordPress Site with Google Analytics, you might also want to customize your AMP Pages/Posts to look like your website for that check The Best Google AMP WordPress Themes.